Securing Kubernetes Workloads using LSM-BPF [Sponsored]
Runtime Security using LSM-BPF and KubeArmor
Until 2019, eBPF was predominantly used for networking and observability tasks such as load balancing, network traffic monitoring, and performance tracing.
Then, Google introduced LSM-BPF which allowed eBPF programs to be attached to the Linux Security Module (LSM) kernel hook points, opening a plethora of possibilities for applications to improve their security policies.
In the upcoming weeks, I’ll try to bring you up to speed, on how tools like KubeArmor leverage LSM-BPF to prevent malicious attacks like Ransomware or Cryptojacking.
In today’s newsletter, we will focus exclusively on LSM-BPF, what problems does it solve, how to enable it, where to attach it, and how to develop and run it.
The Problem…
Since COVID, we have witnessed an alarming rise in cybersecurity threats.
The SolarWinds and Log4J attacks shocked the world, but even more recent incidents have raised concerns.
In early 2024, cryptojackers exploited cloud providers to mine cryptocurrency, resulting in $3.5M in inflated cloud bills and compromised computing resources.
Just recently, the CloudSorcerer APT group targeted public cloud services, stealing sensitive data and causing millions in data loss and recovery costs.
UnitedHealth is facing $872 million in expenses due to a cyberattack on its subsidiary, Change Healthcare, which severely disrupted operations.
Although completely preventing such attacks is almost impossible, implementing effective security policies is critical for the day-to-day operations of any business.
On most Linux systems, this protection is primarily managed through the use of Linux Security Modules (LSM).
I think it’s best to think about these modules as software libraries that allow one to attach security policies to kernel hook points that occur just before:
Opening, creating, moving, and deleting files
Mounting and unmounting file systems
Task/process operations
Allocating and freeing tasks, changing task user and group identities
Socket operations
The LSMs allow system administrators to enforce policies, that either allow or disallow such actions.
The first LSM “gatekeeper” on most systems is Linux capabilities system, which allows administrators to avoid assigning “all-powerful“ root permissions to a process and break it down into smaller categories. To name a few:
CAP_CHOWN: Allows the process to change the ownership of files.
CAP_NET_ADMIN: Grants permission to perform network-related tasks like configuring interfaces.
CAP_SETUID: Allows setting the user ID of a process.
But while Linux capabilities provide more granularity than the traditional root vs. non-root user distinction, they are still fairly coarse.
For example, with the CAP_NET_ADMIN capability, a process can modify all network interfaces on the host, including disabling them or reconfiguring routing tables, which can disrupt network connectivity for other processes.
…of another Problem
To address this, AppArmor and SELinux were introduced to provide even more fine-grained control over system resources, going beyond merely granting or revoking capabilities.
Both technologies were utilized for over a decade, but then Kubernetes emerged.
Long-running services were replaced by ephemeral containers that can be auto-scaled or relocated to another node at any point in time, resulting in an exponential increase in the number of units running per host.
And neither AppArmor nor SELinux knows about Kubernetes. They just don’t care about node metadata or cloud-specific details like AWS or Kubernetes labels. That extra context is invaluable when you’re trying to manage dynamic and distributed systems.
Even though Pod Security Policies support the use of AppArmor and SELinux, managing LSM profiles for hundreds or thousands of Pods across multiple nodes is hard a really big time-consuming task.
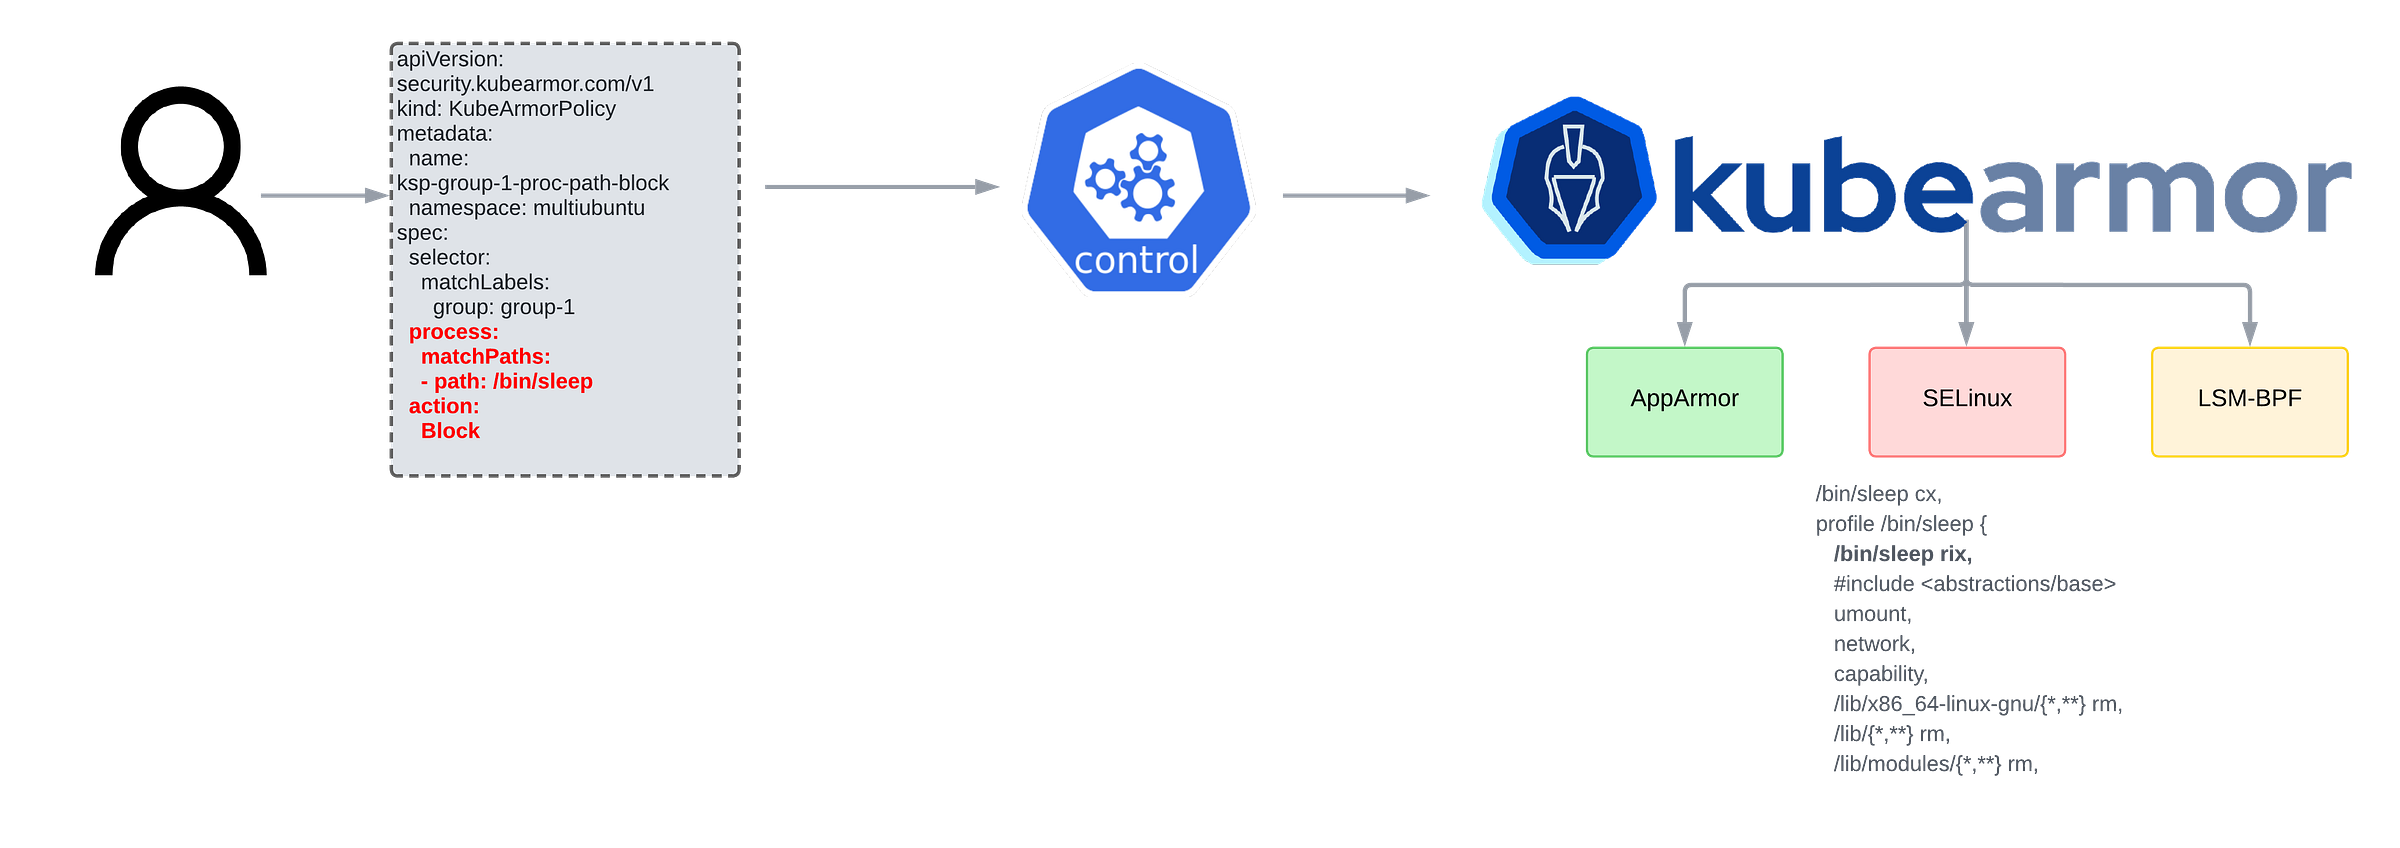
These challenges led to the evolution of modern tools like KubeArmor, which further abstract this through an engine that understands high-level application security policy configurations for resources like Kubernetes Pods and converts them into appropriate LSM policies under the hood.
Shortly after, AccuKnox, the creators of KubeArmor, encountered several issues, including:
GCP and Azure environments had AppArmor support while EKS (Amazon Linux), and RHEL just had support for SELinux which made it harder to ensure efficient policy coverage across all
Navigating SELinux's type enforcement rules was problematic, as changes often triggered a domino effect (single change unintentionally causing a chain reaction of other changes), making it hard to ensure new rules didn't create new security holes.
Given these issues, they moved away from SELinux for container- and pod-based policies.
Although the limitations of LSMs were well-known, they weren't easily addressed at the time, leaving companies somewhat stuck.
Then, everything changed!
The Solution
In 2019, Google has contributed BPF-LSM (Initially called KRSI — Kernel Runtime Security Instrumentation) into the Linux kernel upstream.
Engines were then able to convert user-specified policies into eBPF bytecode that could then be injected at LSM hooks, rather then strictly operate in the confines of AppArmor or SELinux-based policy.
And while AppArmor and SELinux are exclusive (can’t run in parallel to each other), LSM-BPF is stackable i.e., it can operate alongside AppArmor and SELinux thus providing multi-layer defense.
This allowed companies to continue offering host/node-based hardening policies based on SELinux or AppArmor, while tools like KubeArmor, leveraging LSM-BPF under the hood, addressed the challenge of application hardening for pods.
Today, LSM-BPF is natively supported in the default distributions of most major cloud providers.
It’s still possible, your kernel does NOT ship with LSM-BPF support. You can check this using:
💡 The list of active LSMs (second output) reflects the order in which security checks are made — “capability“ a.k.a. Linux capabilities being the first to apply as discussed above.
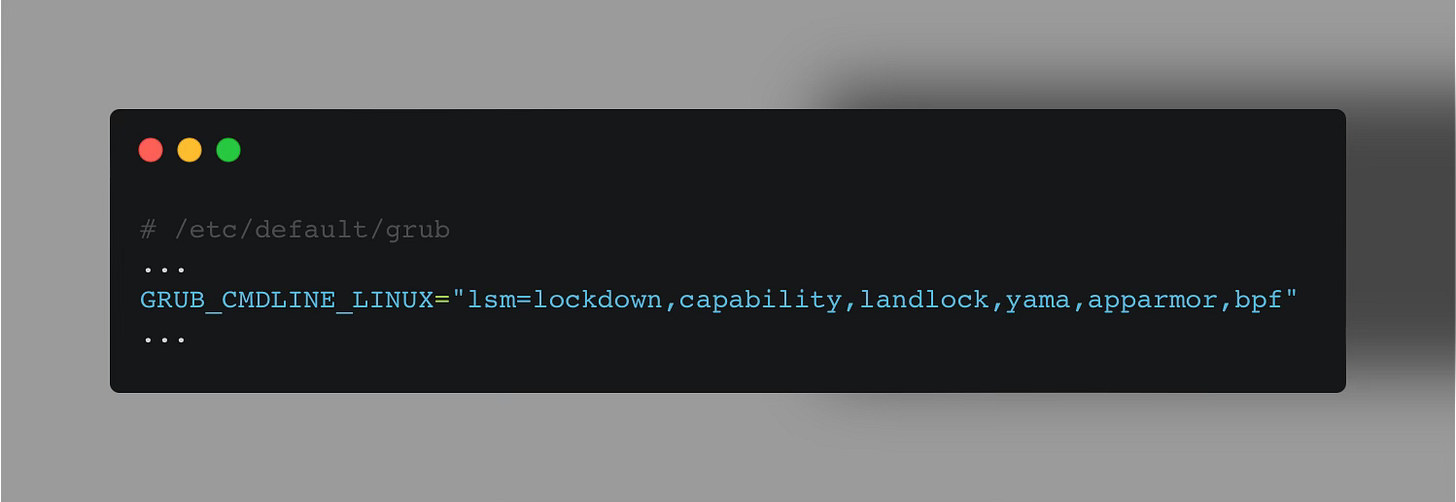
If bpf is not included in the second output, you have to manually activate it.
To do so, update the following line as such in /etc/default/grub (GRUB Configuration):
Afterward, run the update-grub command, reboot the system, and reverify the commands above.
Let’s take a look at a minimal LSM-BPF example.
Code Example
I find that rendering code examples in Substack can be tedious to read, so I’ll point you to my GitHub repository where the code is available.
The README.md provides a clear overview of how everything works.
Here’s the link.
🎥 Here’s a video demonstration.
⏪ Did you miss the previous issues? I'm sure you wouldn't, but JUST in case:
I hope you find this resource as interesting as I do. Stay tuned for more exciting developments and updates in the world of eBPF in next week's newsletter.
Until then, keep 🐝-ing!
Warm regards, Teodor


